Power BI Application Template
This document provides step-by-step instructions to set up the JESI Power BI Application (App) Template as a Power BI Administrator. Once set up correctly, the Power BI App can be shared with other users internally assuming the users have been provided with the necessary access (Power BI licence, permissions, etc.).
Requirements
- Power BI Administrator account
- JESI API Key – refer to How to generate API Key document
Requirements
To allow you to connect your data to Power BI, you require an API Key, to learn more about generating an API Key from JESI: Click here
Installing the JESI Reporting App Template
- Copy the app link provided by JESI and paste it into your browser address bar. This will lead you to a Power BI page
- Please reach out to support@jesims.com.au to discuss how this template link can be attained.
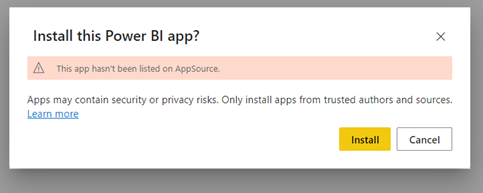
- You will see a prompt to notify you that the app you are trying to access is not available on AppSource. Ignore this and simply click install to start the app installation
Note: Installing this app will install the application as a front end, along with an app workspace as its back end
App – Application front end which has the report(s) and data visualisations
App Workspace – The backend for the application which contains the report and the dataset. Only a Power BI Administrator should have access to this workspace as this is where configurations can be modified, such as the data refresh schedule, app name, access, etc
- Once the application has finished installing, you will be able to see the new application listed on the Apps page. You will also see the new App Workspace in the list of Workspaces. The next step from here is to connect your data
Connect your data and set up Scheduled Refresh
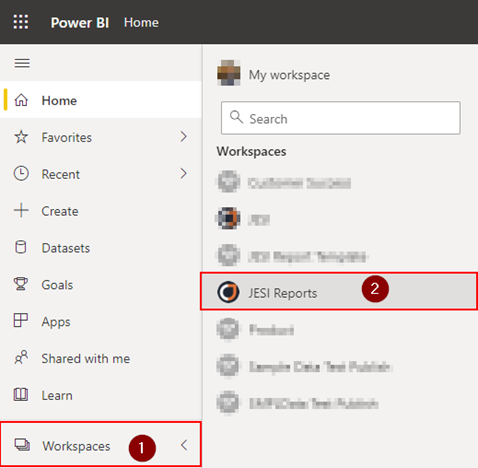
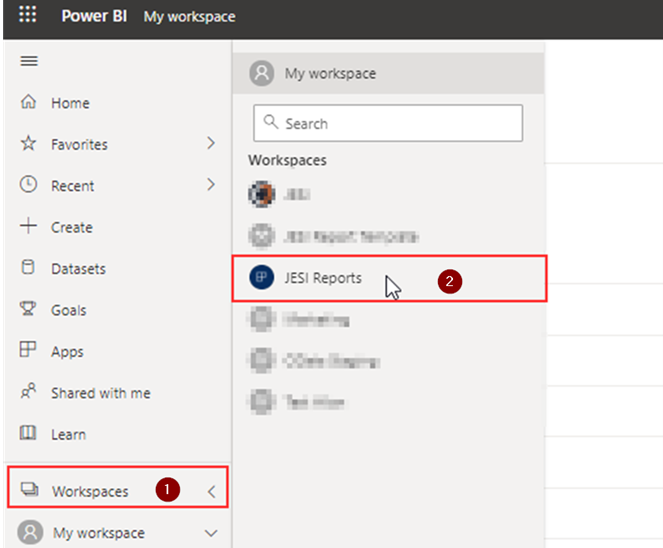
- On your Power, BI Home Page, navigate to your newly installed App’s Workspace by clicking ‘Workspaces’ (1) then selecting ‘JESI Reports’ . This will lead you to the app contents which include the report and dataset
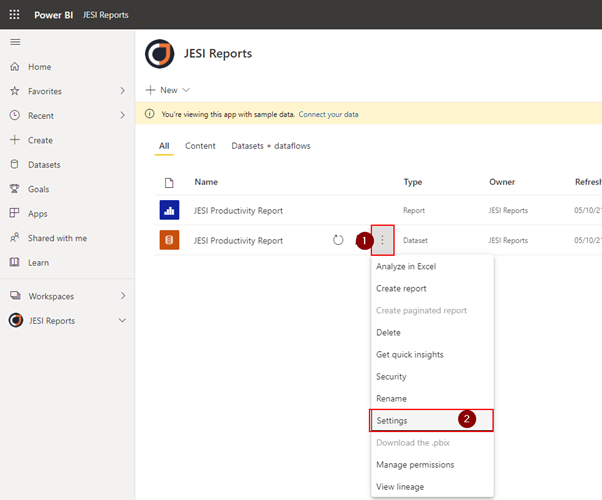
- Hover over the dataset component to show an ellipsis. Click the ellipsis (1) and select Settings (2)
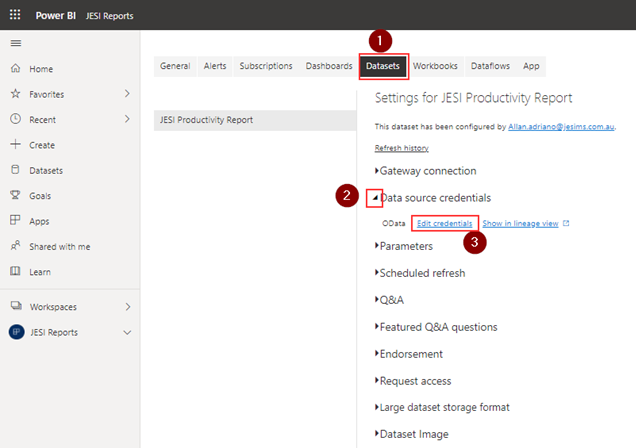
- You should now be on the dataset configurations page. Click the ‘Datasets’ (1) tab on the top of the page. Expand ‘Data source credentials’ (2) and click the Edit credentials (3) link this will take you to the Authentication screen
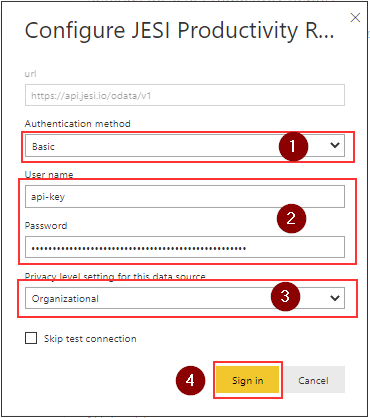
- Under the Authentication method field, select ‘Basic’ (1). Under the User name field enter the value “api-key” (2). Under the Password field add your ‘JESI API Key that has been generated from within JESI’ (2). Select your preferred Privacy level setting (3) now click ‘Sign in’ (4)
Note: We do not recommend enabling ‘Skip test connection’ – leave this unchecked
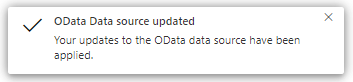
A pop-up message will appear on the top right side of the page to indicate that the sign-in was successful
- To set the scheduled refresh, expand ‘Scheduled refresh’ (1), toggle on ‘Keep your data up to date’ (2), and configure the ‘Refresh frequency’ (3) to your preference. Once finished, click ‘Apply’ (4)
Note: If you want to set up multiple refreshes per day, you can do so by clicking the Add another time link
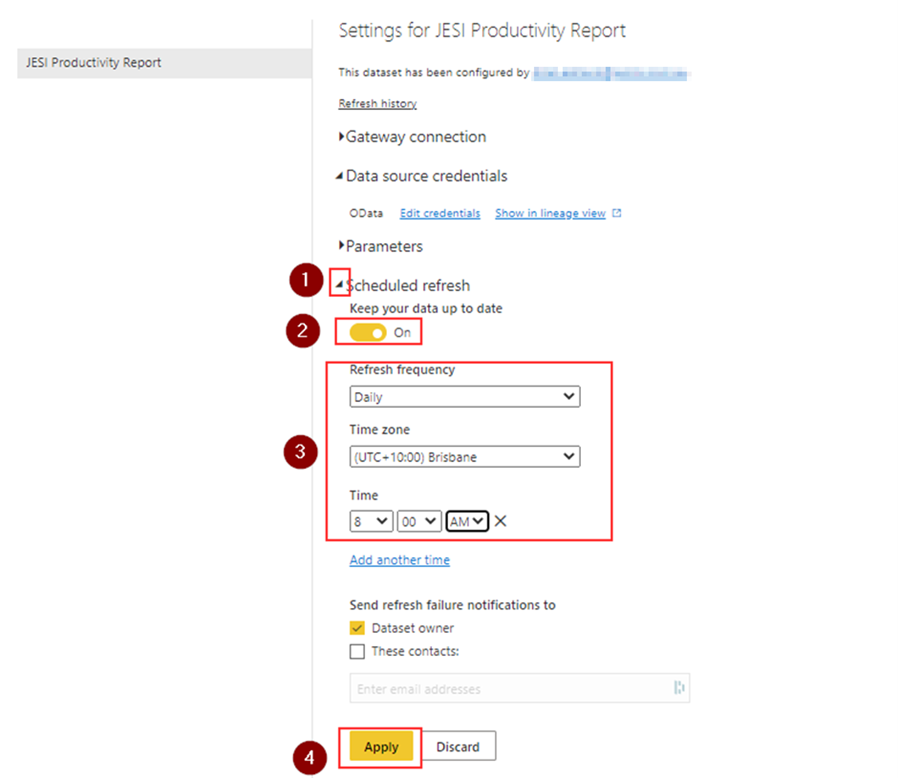
Note: Your dataset refresh limit will depend on the level of your Organisation’s Power BI capacity
Update and Share the App
The final step is to update the installed App and share it within your Organisation
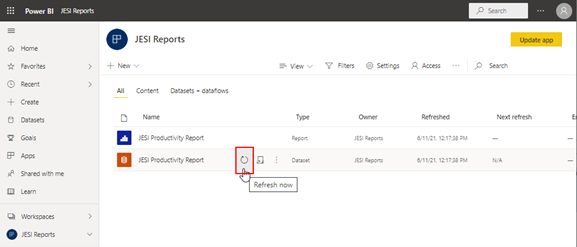
- To apply all the changes that have been made to the application, head back to the app workspace by clicking ‘Workspaces’ (1) then select ‘JESI Reports’ (2). This will lead you to the app contents which includes the report and dataset
- In the App Workspace, hover over the dataset component and click ‘Refresh now’ as shown in the image below
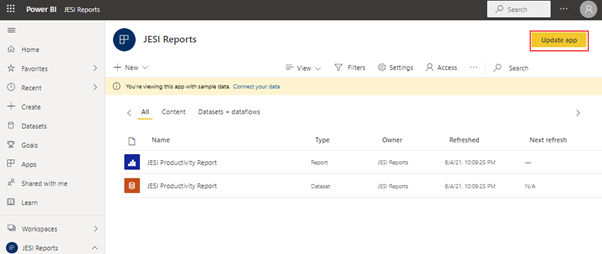
- To roll out the changes to the users with who you have shared the report, click ‘Update App’ on the top right of the page
- You will be greeted with a configuration screen where it will ask you to provide a name for the app that will be distributed to in the ‘App name’ (1) field. In this case, our App name is defaulted to “JESI Reports”. Since you have entered your Organisation’s API Key in the settings, feel free to name it to your liking e.g. XYZ Company JESI Activities. After filling in a suitable app name, provide a description in the ‘Description’ (2) field and upload an App logo (if needed) by clicking ‘Upload’ (3)

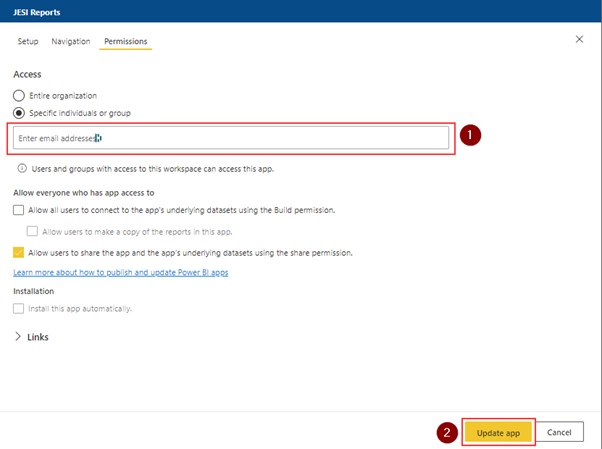
- Navigate to the Permissions tab, here you can specify who has access and what level of access. Specify the individuals or groups that you would like to share the App in Specific individuals or group (1) field
Note: Recommended permissions may vary per organisation. Refer to your internal policies regarding sharing Power BI Apps and Reports.
Once, finished click the yellow ‘Update’ button at the bottom right (2)
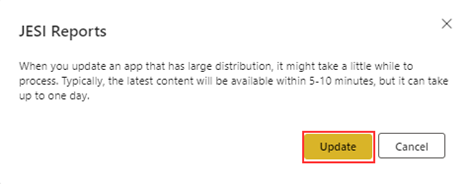
- You will then be prompted that the update time directly correlates to the size of its distribution. The more users the application has been shared with, the longer it will take to update. To start the update process will click ‘Update’
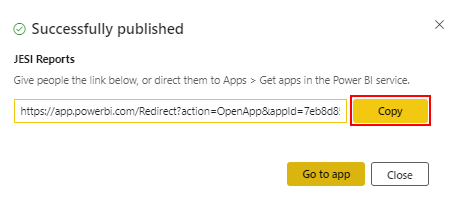
Once the app is successfully updated, the below screen will show. Copy the link by clicking the yellow ‘Copy’ button and share it with the relevant users within the organisation